QuillHubQuillHub
RU

Dictation app for Mac: voice typing in any app

Put the cursor in any text field, press Ctrl+Space, and speak. QuillHub Desktop types with punctuation, then click Insert into window. Every dictation is saved with a title and a copy of the audio, so a note from Tuesday is still there on Friday.

  • Ctrl+Space in any app
  • macOS 14.4 or later
  • 14 days of full access, no card
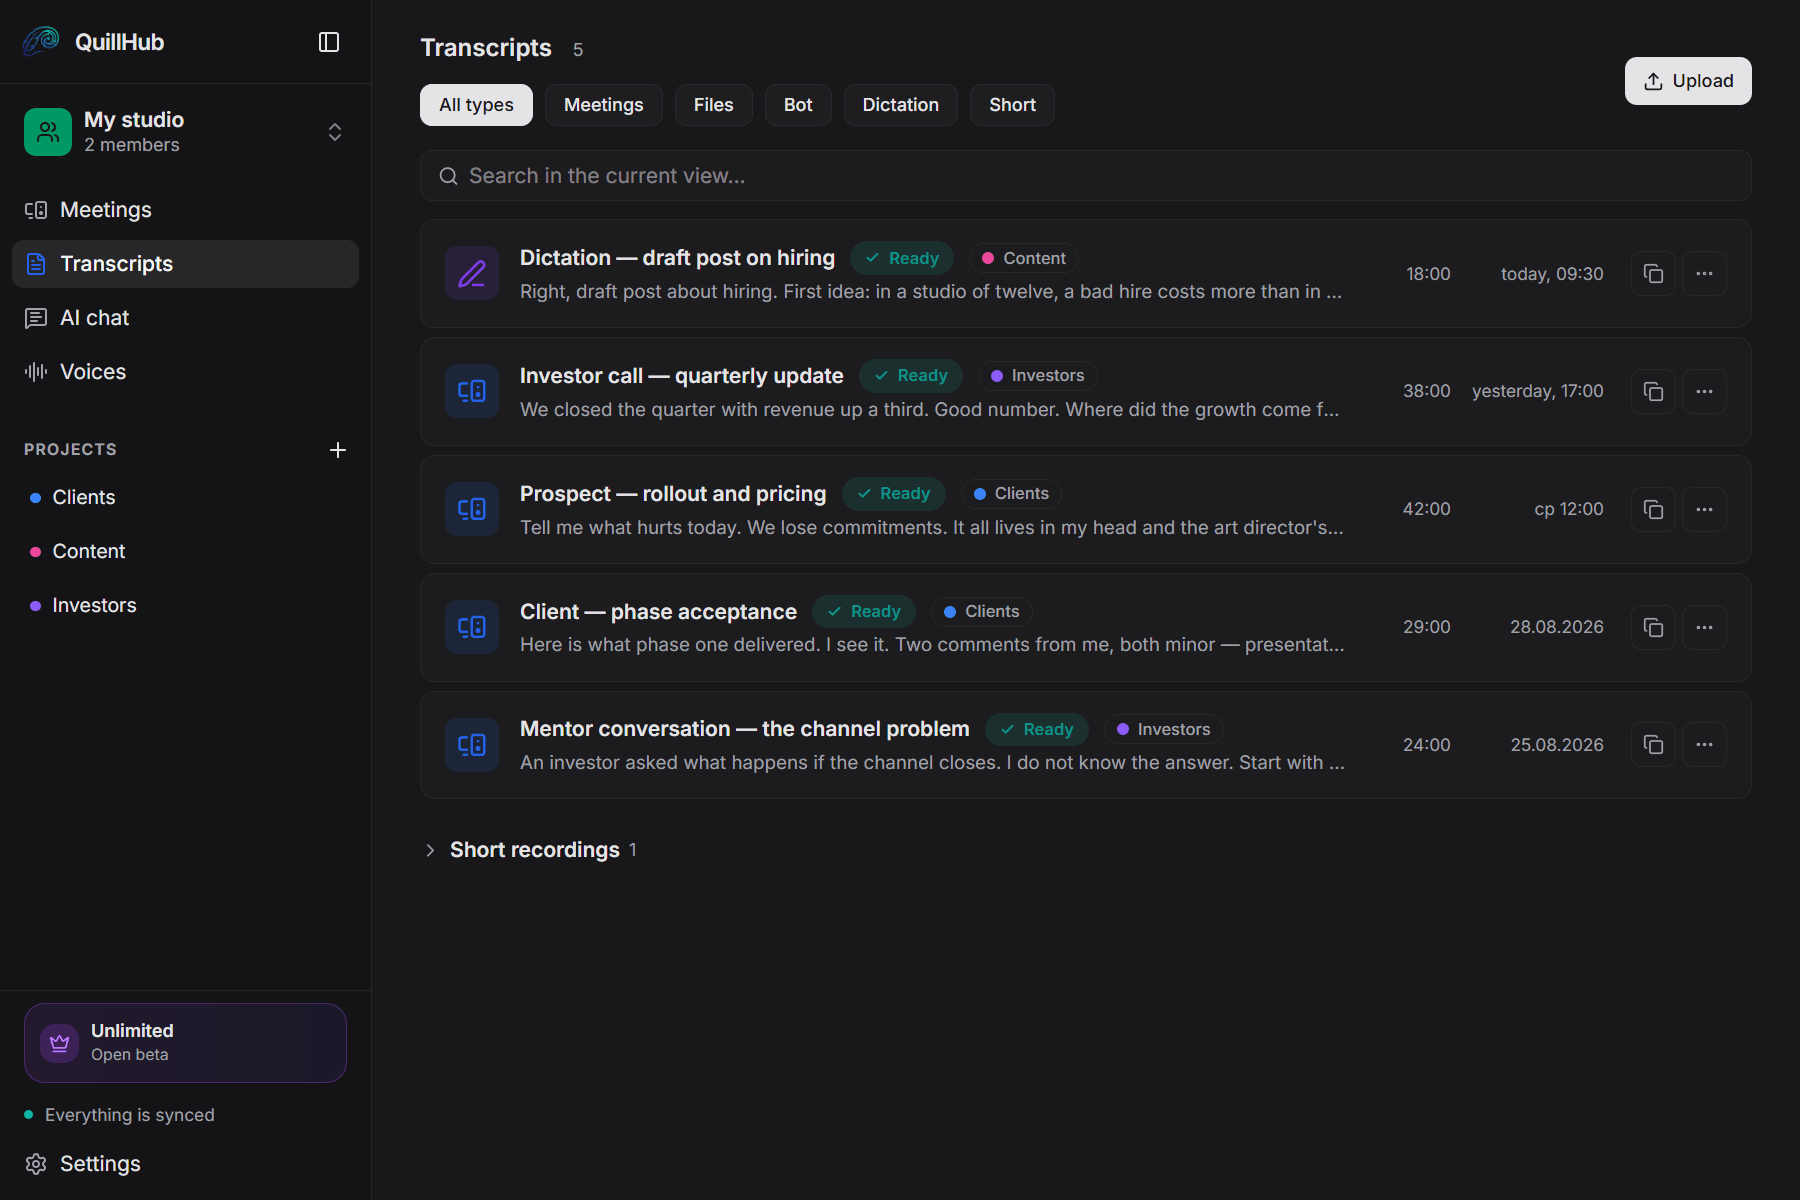
List of recordings and dictations in the QuillHub Desktop app

Sample transcript

A blog post dictated on a Mac, as text

Real QuillHub output with no manual edits: 6 minutes 7 seconds of recording, punctuation and paragraphs added automatically, with timestamps in the text. Above the text: chapters and a summary. Switch the tabs to see each layer.

Blog Post Writing Process — MindMap to WordPress00:00 / 6:06 · John HaydonReady · 4 documents
  • John Haydon1:44

    To add the copy, I use the built-in speech translator in my Mac. All I have to do is double-click the function button to start talking, and then I click it once to stop. Period.

  • John Haydon2:42

    So once I finish editing, which, you know, might take a long time, a short time, what I'll do is I'll just grab all the text within the TextEdit document. I'm going to copy this and I jump over to WordPress.

  • John Haydon4:10

    And then I add images, video. I typically add an image right at the beginning. Right, right at the top. And that same image is usually going to be a featured image as well on the site.

11 more paragraphs, each with a timestamp; click a timestamp to jump the audio there

Continuous speech, now readable text

Basic speech recognition returns a stream of words with no periods or paragraphs. Here the punctuation is in place, the text is split into paragraphs, and each one has a timestamp, so you can read it instead of transcribing it again.

  • Punctuation and paragraphs added automatically
  • Export to TXT, DOCX, SRT, and VTT
  • 0:00Introduction1 min
  • 0:12Outline and Mind Mapping1 min
  • 1:06Drafting and Dictation2 min
  • 3:25SEO, Keywords and Tags1 min
  • 4:08Adding Images and Media1 min
  • 5:13Links and Scheduling1 min
  • 5:57Conclusion1 min

Each chapter has its own timestamp and length

The whole 6 minutes 7 seconds at a glance

Chapters follow the meaning, not the pauses, so you can see what each part of the recording covers and jump to the one you need.

  • 7 chapters across 6 minutes 7 seconds
  • Each chapter links to its place in the recording

A step-by-step walkthrough of a concise blog-post workflow: create a mind map (MindMeister), export an outline to TextEdit, use Mac speech-to-text to add copy, edit, paste into WordPress, perform a light SEO/keyword sweep, set tags/categories, add a featured image (sources like Fotolia)…

  • Start with a mind map to structure the post before writing.
  • Export the mind map outline to a plain-text editor for easier drafting.
  • Use built-in speech-to-text to rapidly produce draft copy, then edit.

Decisions the AI pulled out

  • Use a mind map-first approach to structure blog posts.01
  • Draft by dictation with Mac speech-to-text, then manually edit.02
  • Prefer adding a featured image at the top of the post for social thumbnails.03
  • Perform a modest SEO check but prioritize usefulness and specificity over keyword obsession.04
  • Choose internal or external links based on the post's promotional or informational goal.05

No need to replay 6 minutes 7 seconds

The summary is built from the broadcast itself: key ideas, numbers and the decisions that were actually announced. It can go into a team chat as it is.

  • 5 decisions pulled from the conversation
  • 9 key points in the full summary
One-page digest

Tools mentioned: MindMeister (mind mapping), TextEdit (plain-text drafting), Mac built-in speech translator, WordPress, Fotolia (stock images).

from the recording
Article draft

“Blog Post Writing Process — MindMap to WordPress”: blogging process, content workflow, mind mapping

from the recording
Follow-up email

What was discussed, what was decided, what happens next

template
Task list

Create a mind map (intro, topics, sections) in MindMeister for the blog post.; Export the mind map outline to TextEdit and convert to plain text.

from the recording
Ask the recording

“Create a concise checklist from this blog workflow”: the chat answers from the text and gives the timestamp

chat
Your own prompt

A CRM note, a post, talking points — or any format you need

anything
  • Mind map
  • MindMeister
  • TextEdit
  • Speech-to-text
  • Featured image
  • SEO sweep
  • Fotolia
  • Internal link vs external link

Every AI action is included in the Unlimited plan — no credits per click.

Finished documents on top of the text

The transcript is only the start. From one recording you can build a digest, an article draft or an email — or describe a format of your own.

  • Ready-made templates and your own prompts
  • Chat over the recording: ask anything about the text
  • 8 terms with definitions
Upload your recordingSee the full example(opens in a new tab)60 free minutes when you sign up · No card required

Example: John Haydon, “Time-Saving Hacks to Write More Blog Posts”, YouTube, license CC BY 4.0. Transcript, chapters, summary and key points by QuillHub.

How it works

How to dictate on a Mac with QuillHub

Setup takes a couple of minutes once: install the app and give it two macOS permissions. The built-in macOS Dictation is covered further down, in the tips.

  1. 1

    Install QuillHub Desktop

    Download the app for Macs with Apple silicon or Intel, macOS 14.4 or later. On first launch, QuillHub asks for the microphone, and macOS shows its own dialog: click Allow.

  2. 2

    Turn on Accessibility

    Without this permission, QuillHub can't paste text into another app. Open System Settings → Privacy & Security → Accessibility and switch the app on. In the list it may be called QuillAI.

  3. 3

    Click in a text field and press Ctrl+Space

    A Pages or Word document, an email, a note, a Slack message, a ChatGPT prompt. Press Ctrl+Space and talk: words appear in the dictation window as you speak.

  4. 4

    Click Insert into window

    The text goes where the cursor was. If no field was selected, the text is already on the clipboard: paste it with ⌘V. Either way, the dictation is saved to your archive.

No install

Older macOS or a locked-down work Mac? Dictate in the browser

QuillHub Desktop runs on macOS 14.4 or later. If your system is older or IT doesn't let you install apps, open the Microphone tab: record your voice right in the browser and press Start transcription. The text appears in your account, ready to copy into Pages, Word, or an email.

Click microphone to start recording

60 free minutes when you sign up · No card required

  • Google Drive
  • Direct file link
  • Files MP3, M4A, WAV, OGG, WEBM

What you get

What stays after you dictate on a Mac

macOS Dictation types into the field and keeps nothing. QuillHub types into the field too, then keeps every dictation as a note you can find, reuse, and ask questions about.

Text in any app

Insertion works wherever you can type: Pages, Word, Mail, Notes, Slack, Notion, a browser form, an AI chat. You don't switch windows or copy anything by hand.

Punctuation without commands

Commas, periods, and question marks appear as you speak. Once a dictation is saved, AI proofreads it again and splits long text into paragraphs without changing your words.

Two languages in one sentence

The language is detected on its own. Say a sentence in Spanish with an English product name in the middle, and both come out right; there is no language switch to press.

Clipboard as a backup

If an app refuses the paste, the text isn't lost: it sits on the clipboard, and QuillHub reminds you to paste it with ⌘V.

A copy of the audio

While you dictate, the sound is also written to a file on your Mac. If live recognition fails, QuillHub sends that file for transcription after you stop, and the text shows up in the list.

An archive with titles

Every saved dictation gets a short title based on what you said. Search finds the note you dictated after Tuesday's call when you need it on Friday.

AI over your dictations

AI chat finds what you said in your dictated notes

All week you dictate ideas for a newsletter between other work, and on Thursday you need an outline. Ask the archive, and the answer links to the dictation it came from.

Newsletter idea · 1 voice02:40
What ideas did I have for the next issue?

Three: a reader Q&A about switching tools, a short case study of the onboarding redesign, and a list of five keyboard shortcuts nobody uses. You said the case study should go first.

Newsletter idea · 01:15 — the fragment is lit on the track
Did I already ask Dana for the redesign screenshots?

Yes, in the dictation “Message to Dana” from Tuesday: you asked for before and after screenshots by Friday.

Message to Dana · dictation
newsletter · ideas
redesign · screenshots
01

Questions across all dictations

The chat answers from your whole archive and links the recording each answer came from.

02

Text in the format you need

The Follow-up and Tasks buttons in the chat, or your own prompt: “turn this week's notes into a newsletter outline.”

03

Access for your AI agents

An MCP server lets Claude and other AI agents read your notes directly.

Every AI action is included in the Unlimited plan — no credits per click.

Compare

macOS Dictation, Word, Google Docs, and QuillHub compared

Dictation is already built into macOS, and for a few sentences it is enough. Here is how it differs from dictation in Word, Google Docs, and QuillHub. Apple, Microsoft, and Google details are from their help pages as of November 2026.

OptionHow to startPunctuation and languagesWhat you keepKeep in mind
macOS DictationSystem Settings → Keyboard → Dictation; Microphone key, Fn twice, or your own shortcutAdds commas, periods, and question marks in supported languages, English included; other marks by voice commandsText in the field onlyFree and can run on the Mac itself; stops after 30 seconds of silence
Dictate in Word for MacDictate button on the Home tabAuto punctuation where the language supports itText in the documentMicrosoft 365 subscription; works inside Microsoft 365 apps only
Google Docs voice typingTools → Voice typing in Chrome, Edge, or SafariPunctuation by commands (“period”, “new paragraph”)Text in a Google DocDoesn't type into Pages, Word, Mail, or other apps
QuillHub in the browserMicrophone tab or the Dictation screen, nothing to installLanguage detected automatically, punctuation addedText with paragraphs in your account; summary and chapters for longer recordingsYou copy the text yourself; needs an account and internet
QuillHub DesktopCtrl+Space in any app, shortcut can be changedLanguage detected automatically, punctuation added, languages can mix in a sentenceText at the cursor, a titled copy in the archive, an audio file on your MacmacOS 14.4 or later, Accessibility permission to paste, internet connection

Where dictation on a Mac saves the most time

Voice typing pays off wherever you write a lot of text in a day.

Documents in Pages, Word, and Google Docs

A report, an article, a proposal. Dictate the draft in whole paragraphs and leave formatting and edits for later.

Email in Mail, Outlook, and Gmail

A long reply is faster to say than to type. Cursor in the message body, Ctrl+Space, and a minute later the email is ready to proofread.

Prompts for ChatGPT and Claude

A good prompt has context, and context is tiring to type. Say it out loud with all the details, then send it as is.

Notes in Notes, Notion, and Obsidian

A thought after a meeting, a plan for tomorrow, an idea for a post. By voice, the note is done before you would have finished typing the first line.

Slack and Messages

Your teammate gets text instead of a voice message: faster to read than to listen to, and easy to search later.

Tickets in Jira, Linear, and Trello

A bug report, a comment, a card description. A web form field accepts the paste just like Pages does.

Who it's for

Who gets the most from voice typing on a Mac

Plenty of writers, product teams, and founders work on a Mac. Here is who saves the most time with dictation that works in any app.

Writers and journalists

A draft starts with a dictated paragraph

An intro, a lede, a thought after an interview: it is ready in your head long before it is on the screen. By voice, the draft in Pages appears in minutes, and your time goes into editing.

  • Dictation straight into Pages, Word, or Google Docs
  • Punctuation without saying “comma”
  • An archive of drafts with search
QuillHub for writers and media

Product managers

Interview takeaways written down right away

After the third user call of the day, details blur. Two minutes of voice into a note while the call is fresh, and on Friday the report comes together from the archive.

  • A note straight into Notion or your tracker
  • The Tasks button in the chat over your dictations
  • Desktop can record the interviews themselves too
QuillHub for product teams

Founders

Investor updates and team emails without typing

A monthly update, a reply to a partner, a task for the team. Founders talk most of the day, and saying the text is easier than sitting down to type it.

  • An email by voice in Mail or Gmail
  • The Follow-up button in the chat over a dictation
  • Questions to the chat across the week's dictations
QuillHub for founders

Sales

Call notes in the CRM in a minute

The deal record gets updated last, and details get lost. Saying the outcome of the call is faster, and the text goes straight into the CRM field.

  • Ctrl+Space in the deal or contact field
  • A follow-up email to the client by voice
  • Search across past notes in the archive
QuillHub for sales teams

Tips

How to dictate on Mac with the built-in Dictation

If macOS Dictation is all you need, here is how to set it up and fix it. Menu names follow Apple's guide for the current macOS; older versions may differ slightly.

  • Turn on Dictation in settings

    Apple menu → System Settings → Keyboard, then turn on Dictation and click Enable. The first time, macOS asks whether to share audio recordings to improve Siri and Dictation; Not Now is fine.

  • Pick a shortcut and start

    In the same section, open the Shortcut menu: the Microphone key, Press Fn Key Twice, or Customize. Click where the text should go, press the shortcut, and speak. Escape stops it, or use Edit → Start Dictation.

  • Say the commands

    Auto-punctuation adds commas, periods, and question marks in English. For the rest, say the command: “new paragraph”, “exclamation mark”, “all caps”, “open parenthesis”. Apple keeps the full list in its guide.

  • Check the microphone

    Dictation starts, but no text appears? Look at Microphone source in the Dictation section: it shows which device the Mac is listening to. Choose the right one or leave Automatic.

  • Keep pauses under 30 seconds

    Dictation turns off when it hears no speech for 30 seconds. There is no length limit: as long as you keep talking, it keeps typing.

  • Ctrl+Space switches your keyboard? Change the shortcut

    On a Mac, Control-Space selects the previous input source. If that combination switches your keyboard layout and the QuillHub window doesn't open, set another shortcut for voice input in QuillHub Settings → Shortcuts.

Not only on the Mac

Voice typing in Telegram on Mac and iPhone

In Telegram for macOS, Ctrl+Space works like in any other app: the text goes into the message field. On your phone, send a voice message to @QuillAI_Bot and get the text back. Link Telegram to your account, and the bot's transcripts appear in the same archive.

Open @QuillAI_Bot
  • Ctrl+Space in the Telegram message field on a Mac
  • A voice message to the bot from your iPhone, text in reply
  • After linking, minutes and plan are shared with the website

Pricing

The more you record, the cheaper the hour

Start free, pay only when you need more.

Our lowest price
Unlimited

from$6.66per month

Six months of unlimited — $39.99 up front. Minutes are not counted at all.

Get Unlimited

Six months — $39.99, billed once.

What $6.66 a month works out to

10 hours$0.67/hr
20 hours$0.33/hr
50 hours$0.13/hr

The same $6.66 in one-off packs buys about 500 minutes — roughly eight hours. Then they run out; Unlimited doesn’t.

Month by month the same half-year would cost $59.94 — a $19.95 difference.

One-off minute packs
from $2.99
Not a subscription. Minutes never expire and stack with your balance.
150 minutes — $2.99350 minutes — $4.99750 minutes — $9.992,950 minutes — $29.99

The minute gets cheaper with volume: from $0.020 in the smallest pack to $0.010 in the largest.

Start
$0
60 minutes when you sign up
  • 60 minutes to try, they don't expire
  • All languages and speaker recognition
  • Export to a document
  • No card required
Get started
Team

A shared workspace, projects and roles. Invoice billing and paperwork for companies.

$14.99per seat, per month
Start a team

FAQ

Questions about dictation on Mac

If your question isn't here, write to support.

It is an app that turns your speech into text on a Mac: you talk into the microphone, and the text appears where the cursor is. macOS has Dictation built in. QuillHub Desktop adds an archive of every dictation with titles and search, an AI chat over your notes, and a copy of the audio on your Mac.

After you press Ctrl+Space, the microphone audio goes in small pieces to a speech recognition model, and words show up in the dictation window almost at once, already with punctuation. At the same time, the sound is written to a file on your Mac. When the dictation is saved, a language model proofreads it once more: it splits the text into paragraphs and gives it a title without rewriting your words. A longer recording made with Record a note (over 5 minutes by default) goes through full transcription and also gets a summary and chapters.

Choose Apple menu → System Settings → Keyboard, go to Dictation, turn it on, and click Enable. In the same place, pick the language and the shortcut. Then click in a text field, press the shortcut, and speak. It works the same way on a MacBook, iMac, and Mac mini.

For macOS Dictation, it is the Microphone key in the top row, if your keyboard has one, or the shortcut you choose in System Settings → Keyboard → Dictation, for example Press Fn Key Twice. In QuillHub Desktop, the default is Ctrl+Space; you can change it in Settings → Shortcuts.

Say a punctuation mark by name (“comma”, “question mark”, “quote”), “new line” or “new paragraph” for line breaks, “caps on” and “all caps” for capital letters, “no space on” to join words, and “numeral” to write a number in digits. In English, commas, periods, and question marks are also added automatically. QuillHub doesn't use commands: it punctuates on its own.

Check in order: is Dictation on in System Settings → Keyboard, is your language added, and which microphone is set in Microphone source. Remember that Dictation stops by itself after 30 seconds of silence and isn't available while Voice Control is on. If QuillHub Desktop doesn't start, open Privacy & Security → Microphone and make sure the app has access, and that Ctrl+Space isn't switching your input source.

Apple Dictation types into the field and keeps nothing. QuillHub also types at the cursor, and then saves every dictation with a title and search, keeps the audio in a file on your Mac, lets you ask an AI chat about all your notes, and handles two languages in one sentence. Apple Dictation, on the other hand, is free, needs no install, and can work without internet.

Most often QuillHub doesn't have the Accessibility permission: without it, macOS doesn't let the app press ⌘V in another window. Turn it on in System Settings → Privacy & Security → Accessibility; in the list the app may be called QuillAI. The other common cause is that the cursor wasn't in a text field. In both cases the text is already on the clipboard, so press ⌘V.

Yes. With a Microsoft 365 subscription, Word for Mac has a Dictate button on the Home tab. macOS Dictation also works in Word, as it does in any app. QuillHub Desktop types into Word with Ctrl+Space and keeps a copy of every dictation in your archive.

macOS 14.4 or later: MacBook Air, MacBook Pro, iMac, Mac mini, and other Macs with Apple silicon or Intel. If your system is older, dictate in the browser: the Microphone tab on this page works without installing anything.

macOS Dictation is free and built in. QuillHub Desktop is free to download; your first meeting recorded in it starts 14 days of full access with no card, and that includes up to 10 hours of dictation. Browser dictation uses the 60 free minutes you get at sign-up. After that, Unlimited is $9.99 a month, or buy minute packs from $2.99.

macOS Dictation can process speech on the Mac itself for supported languages, so it can work offline. QuillHub can't: it recognizes speech in the cloud and needs a connection. QuillHub Desktop does keep the audio of each dictation in a file on your Mac, so you can upload it for transcription once you are back online.

Only you, plus anyone you share a link with: share links are off until you turn them on. For live text, the audio goes to Gladia (EU) for recognition, and a copy stays on your Mac. Transcripts are encrypted in transit and at rest.

Your data

What happens to your recordings

Doctor's appointments, legal consultations and therapy sessions go through QuillHub. That is why we say this plainly instead of burying it in the terms.

Who processes your data

Encryption — files and transcripts are encrypted in transit and at rest, and only you and the people you share a link with have access.

Never used for training — recordings are not used to train models and are not passed to third parties.

Delete anytime — a recording can be deleted at any moment, together with its transcript and everything derived from it.

Transparent subprocessors — the list of services involved in processing is published on its own page.

Try the dictation app for Mac

QuillHub Desktop: Ctrl+Space in any app, punctuation without commands, every dictation saved with a title. Your first meeting recorded in the app starts 14 days of full access with no card, with up to 10 hours of dictation included. No install needed to dictate in the browser: 60 free minutes when you sign up.